
So maybe by now you know that you need to create a website for yourself or your business. But now you’re stuck on one big question: how do you create your own website?
And that’s a perfectly valid question. Building a website — and especially a website that’s going to help either yourself or your business — is no easy task. Sure, all of the commercials you see and hear make it sound really easy, and it is getting easier from a technical standpoint, as you’ll see in this post.
But creating a website that succeeds still requires time and effort and knowing what you’re doing.
So this blog post is going to take you through how you can create your own website in a step-by-step manner so that you know what you’re doing ahead of time.
And when you do finally create your new website, it’ll be as perfect as possible right from launch.
Table of contents
- 1. Create a plan for your new website
- 2. Choose your domain name
- 3. Figure out what platform you want to use
- 4. Select a web host for your website
- 5. Setting up your website
- 6. Picking a design that works for your business
- 7. Adding in extra functionality for your website
- 8. Entering in content for your new website
- 9. Taking your website live
- 10. Managing your website after launch
- Get started on your new website with help with the SMB kit
1. Create a plan for your new website
The first step in creating your own website is to create a plan. After all, if you’re not planning, you’re planning on failing.
And the good news is that you don’t need a super fancy plan or any of that. In fact, just writing down a basic, simple plan that you know and can follow is good enough.
Really, all the plan needs to cover is what this website is going to be, what goal(s) you’re trying to accomplish with this website and how the website is going to help you accomplish those goals.
So for example, if you have a small business and you want to jump into the ecommerce waters, your goal for this new website would be to sell your products online. And you would need to create an online store to sell those products.
From there you can get more technical. So then you might start to think through the different platforms you might use to create the new website, whether it’s Shopify, WordPress and WooCommerce or something else. And you can continue on until you feel comfortable with your plan for the new website.
But starting that plan and thinking through those couple of main ideas will set you up for success down the road. If you want to take a deeper dive into creating a plan for your new website, you can check out this blog post I wrote on it.
2. Choose your domain name
The next step to take to create your new website is to purchase a domain name.
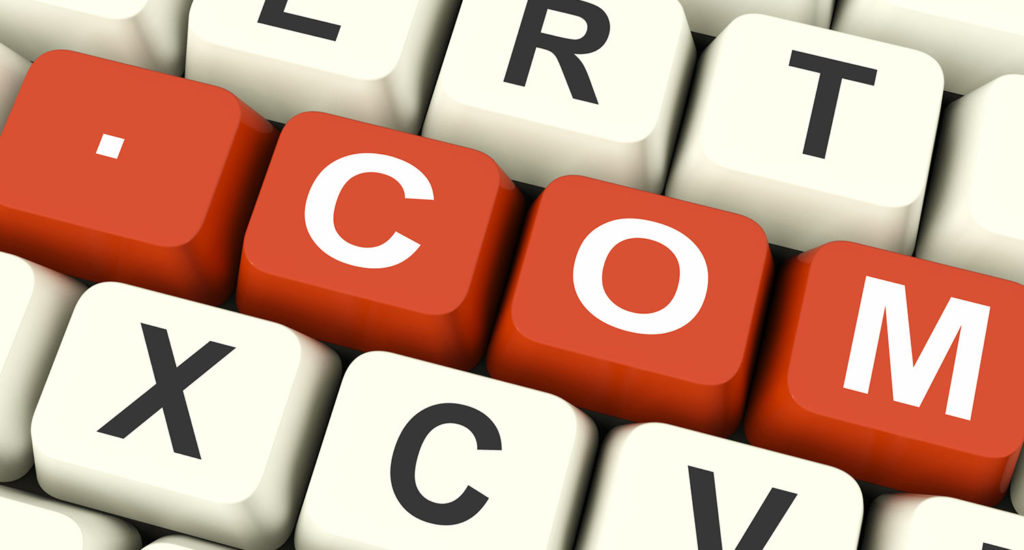
What is a domain name? To put it simply, a domain name is the string of characters that a user enters into their browser’s address bar to go to a website. The easy examples are facebook.com, google.com, twitter.com, etc.
Think of it this way, the domain is to your website what your physical address is to your home. It simply points to where your website is hosted so that the user can load up your site.
Now, I do want to point out that a domain name is different from web hosting. We’ll touch on web hosting in the next section, but that is where the files and database for your website live. Your domain then points to that location where your website is hosted, to make it as simple as possible.
As for what you should pick for your domain name, I would highly recommend trying to get your name if the website is just for yourself or your business name if the website is for your business. If you have a unique name, that should be pretty easy. And while you can use a top-level domain of dot me or dot blog or something unique like that, it’s probably best to just stick with a dot com domain.
If your name is more common, you might need to get more creative with the domain name or pick a dot me, dot blog or other top level domain variant of your name.
To purchase a domain, you can use a service like Name.com, Namecheap or Hover.
But definitely take some time to think about what your domain name is going to be before you purchase it. You only get one shot at this.
3. Figure out what platform you want to use
Now that you’ve decided (and purchased) your domain name, it’s time for the next step in creating this new website: figuring out what platform you want to use.
The good news is that there are a lot of great options in today’s world to create a new website. The bad news is that there might be too many good options to choose from.
Which one you’ll want to go with will really depend on your situation and what you feel comfortable with.
If you’re looking for something quick and easy, using a website builder like Wix, Squarespace or even WordPress.com is a really good option for you. They are good for really small websites and for testing the website waters, especially if this is your first-ever website.
If you want a bit of a step up and to sell products online, you can use Shopify, which gives you your own online store on their service and makes it fairly straightforward to get started.
If you want to control everything and don’t mind a bit of a learning curve, you can go for an open source content management system like WordPress. With WordPress or any other open source CMS, you will need to purchase your domain and web hosting separately, but a lot of web hosts make it really easy to spin up a WordPress website in minutes. And there can be a learning curve with how to use them.
But on the other hand, these CMS will allow you to customize everything on your website. You can choose any number of free and paid designs for your website and add in any plugins or extensions you want to make your website an online store, community website, a membership website or anything else. And you’ll own your own content, which is crucial in today’s world.
But spend some time analyzing your options for creating this new website. You can check out the video below to take a deeper look at your options to figure out which one is best for you.
4. Select a web host for your website
If you’ve decided to use a platform like WordPress, Drupal or Joomla, the next step for creating your new website is to pick a web host for your website. Like I mentioned before, this is where the files and database for your website will live.
The good news is that you have a lot of really good options here. And since you don’t need any super fancy hosting since you’re probably not going to be expecting millions of visitors (at least right now) and you’re probably not going to be selling a whole lot of products.
In this regard, I highly recommend checking out Siteground and Pressable for WordPress-specific web hosts. And Inmotion Hosting and Hostinger are really good for any content management system.
All of these companies are great, and I’ve never had an issue with them before. And they should all have relatively cheap hosting for the level of service they provide you. I don’t think you can go wrong with any of them.
If you want to take a deeper dive into the best web hosting companies, you can check out the blog post I wrote on it.
5. Setting up your website
Once you’ve selected a platform and a web host, the next step is to set up your website.
How you set up your website is going to depend on the platform that you’re using. Most platforms have a setup and walk-through process for getting started on your website. You’ll want to follow that setup process and fill out as much information as possible for your site.
Since I’m most familiar with the WordPress setup process, I’m going to go through that process here. Obviously other platforms will be a bit different but there might be some similarities from an overall perspective.
a. Setting up a WordPress website
With WordPress today, a lot of web hosts have either a one-click install for WordPress or will spin up your WordPress website for you when you sign up.
Once your website is created, you should first get familiar with the dashboard. It’s pretty simple now, but it can get a bit overwhelming once you start adding in plugins.
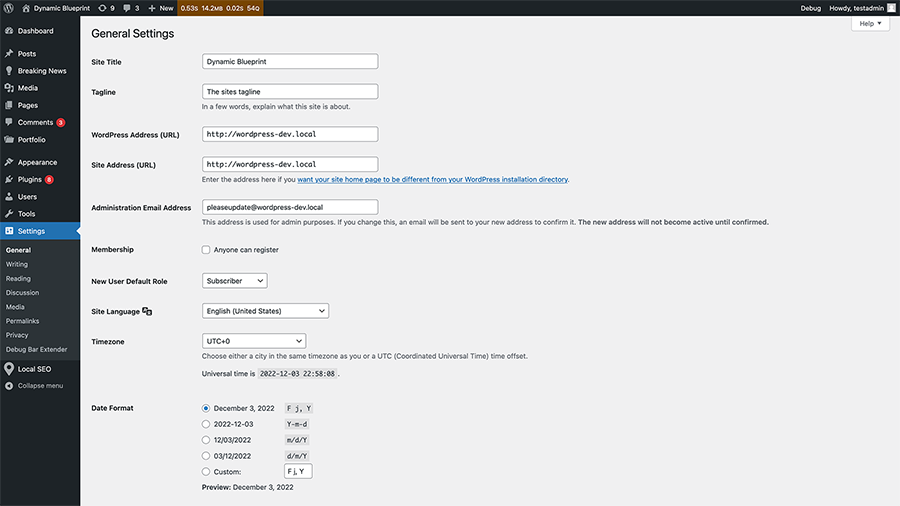
Next, you should go through the site settings, which can be found under the “Settings” menu item in the left-hand menu in the dashboard.
The first section is the general settings where you can update your site title, the administration email, your date and time settings. Just a heads up, for the timezone setting, use the city-based time zones and the UTC time zones.
The next section is the writing settings which primarily focus on setting up writing and publishing posts by email, which honestly is not a great idea.
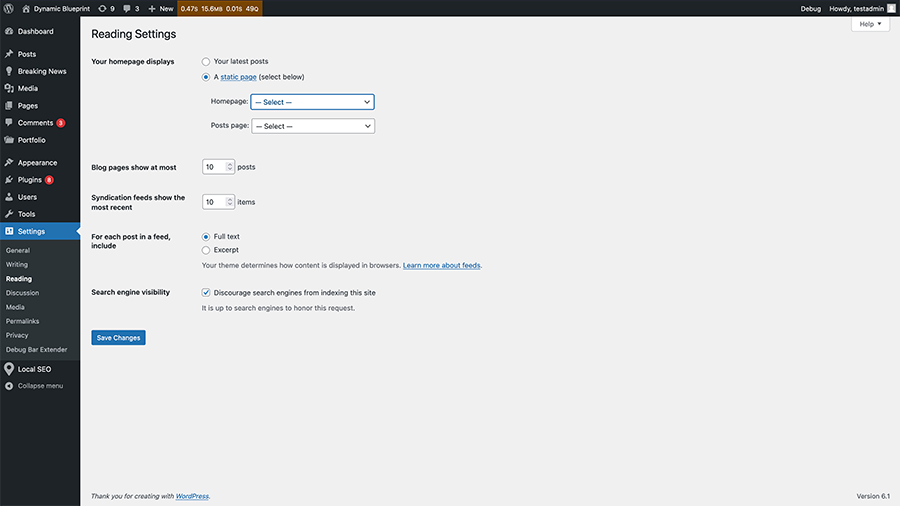
The next section beneath that is the reading settings where you can set up what page is your home page, what page shows your blog posts (if the theme you’re using doesn’t have a blog page template) and whether or not search engines can index your website or not. You should have this setting checked while you’re building your website and then uncheck it when your website goes live. If you don’t see your website in search results, come back here to make sure you don’t still have it checked.
The next section is the discussion settings which control comments on your website. The media settings in the next section deal with images and how they are uploaded to your website.
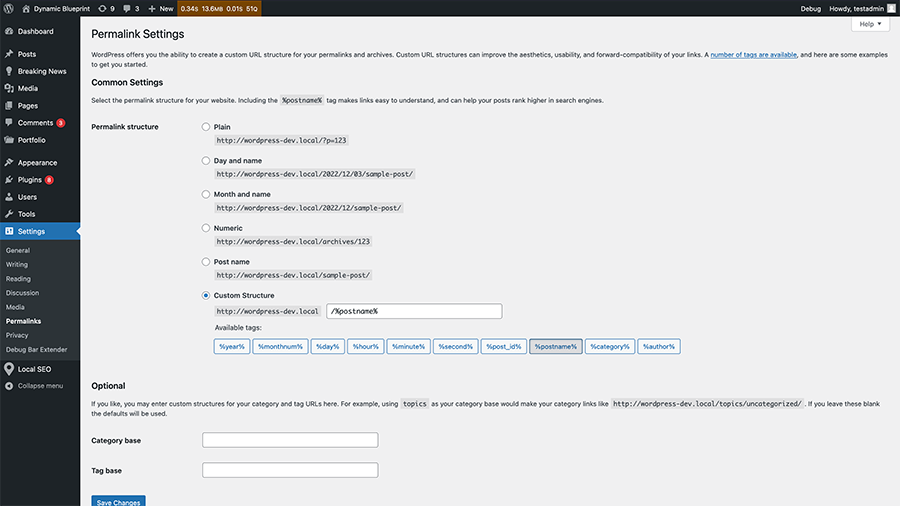
Next up is the permalinks settings, and these are really important. These settings will set up the URL for all of your posts and pages for your website. And once you’ve set them, you can’t really change them because you’ll cause a lot of 404 errors if people try to go back to the old URLs and search engines will definitely not like your website.
So you need to choose your permalink structure carefully. I highly recommend going with either post name or a /%category%/%postname%/ permalink.
Finally, the last section is the privacy settings where you can create a privacy policy page for your website, which I highly recommend.
6. Picking a design that works for your business
The next step in creating a new website is to pick a design for your website that matches what you need.
The specifics are really going to depend on what platform you’re using, but here are some guidelines that should work for any platform.
First, make sure that it has a good design and that it reflects who you are. If you’re a construction company, you probably don’t want something that looks super artsy (unless it actually fits your business). And if you focus on photography, you don’t want a design that focuses more on text-based content.
Make sure that all of the important parts, like the navigation, the content, the footer text, etc., are all readable and usable. And make sure that you like the design (duh).
Second, make sure that it’s still being developed. If you choose a design that is no longer supported, at best you’ll get a theme where the bugs will never get fixed and at worst you might be using a theme that’s a security risk. So make sure that it’s been updated recently.
Third, check to make sure that it’s accessible. You can use the WAVE browser tool to test the demo for accessibility. If there are a ton of errors when you check it, you should avoid it. You want everyone to be able to use your website no matter what technology they use to browse the web.
Finally, just try out the demo as much as possible to make sure that it’s something you want for your website before you purchase and/or download it.
Once you’ve picked out the design for your website, it’s time to add in functionality to your website.
7. Adding in extra functionality for your website
Once you’ve got your website set up and a design picked, the next step is to add in extra functionality to your website with plugins and extensions, if your platform allows it.
Like a lot of things, the specifics are going to depend on what platform you’re using. But here are some general areas where you should add in functionality.
First, you’ll want to start with SEO, or search engine optimization. This will help your website get found in Google searches. There’s a lot that goes on with SEO, and any plugin isn’t going to instantly make your SEO perfect. But it will help with the technical side. If you’re using WordPress or Shopify, I highly recommend the Yoast SEO plugin.
Next, you’re going to want to make sure that security is tight on your website, especially if you’re selling products. Platforms like Wix and Squarespace will likely take care of this for you, but if you’re using something else, you might need to add it yourself. If you’re using WordPress, I would go with the Wordfence plugin to secure your website.
The next area is forms. You need to have contact forms on your website for people to get in touch with you, especially if this is a freelancing or business website. Some platforms might include this for you. But if you’re using WordPress, I recommend the Gravity Forms plugin (premium) and the WPForms Lite plugin (free) for your website.
Finally, the last area is analytics. You want to know how people are using your website (Google Analytics) and how they are finding your website in searches (Google Search Console). Again, Wix, Squarespace, Shopify and similar platforms will likely either set this up for you or walk you through this process. But for others, you might need an extension to help you out. If you’re using WordPress, I highly recommend the Google Site Kit plugin.
Once you’ve got those in place, it’s time to add in the most important part of your new website: the content.
8. Entering in content for your new website
Now that you’ve added in your chosen design and installed any plugins or extensions you need for the website, it’s time for the most important step in creating your new website: the content.
What you add for content is ultimately up to you. But here are four pages that you have to have on your website no matter what and one that you might want to have.
a. Crafting your homepage
The most important page on your website is your homepage. It’s what people are most likely going to see when they land on your site. So it’s worth taking some time to think about what you want on your homepage.
And the good news is that with today’s tools, no matter what platform you’re using to create your new website, it’s pretty easy to create a completely custom homepage that matches your style.
For your website, you’ll at least want to have a “hero section” with a headline and descriptive text that welcomes a reader to your website and invites them to read more. If you have a great photo that you’ve taken that can really impress people, you probably want to make that the background for the section.
If you’re creating a website as a freelancer or for a business that performs services, you’ll also want to make sure you show off your best projects on the homepage as well. You can have a small gallery of your best work with a link to your full portfolio of projects.
If you’re creating an online store, it’s a really good idea to show your top or featured products here on the homepage with a link to your full store page to draw them into your website.
And remember, this is the first impression people will get of you and what you do. So make sure you only select the best photos to show on your homepage. And you’ll want to swap photos out as time goes on.
You’ll also want a brief introductory paragraph about who you are as well as a link to your about page. You can put a photo of yourself here if you want to.
And don’t forget to list your latest blog posts on the homepage as well and link to your blog.
But at the end of the day, make it your own. A lot of the platforms these days have designs that can make creating this page super easy. So play around with it and find what works for you.
b. Creating a store page
If the website you’re creating is an online store, you’ll need to create a store page on your website.
This is where all of your products can be found and you can have filters and a search area for people to narrow down their search to something they need.
How this looks and how you can edit it depends on what platform you’re using. But here are some things that you’ll need to think about no matter what.
First, make sure that you have a good featured image for every product. First impressions matter, and nothing makes a better first impression than a great image.
Next, make sure that you clearly list the price of each product. People don’t want surprises at the checkout step, so make sure they know the price of the product they’re looking at.
Finally, really think about how you organize your products into categories so that it’s easy for customers to find the products they need. An easy user experience will lead to more sales.
c. Building perfect product and services pages
Also, if your website is selling products or services, you’ll need to create great product and services pages. Again, the specifics will depend on the platform, but here are high-level things to think about.
For product pages, you’ll want to make sure you have high-quality photos of the product. Once again, first impressions matter, and showing a great photo of the product and having photos of the product in action can help someone make the decision to buy it.
Also, you’ll want to have well-written description text that says what it does and how it can help a customer. You’d be surprised how much this can make a difference, especially for people who might not be able to see the product.
But make sure your product page really shows off your product in the best way possible. This is your chance to get them to make the decision to buy the product. You can learn more about how to craft the perfect product page in the video below.
For services pages, you’ll need to talk about the service, what it does and how it can help a customer or client. Talk about a pain point they might have and how this service can fix that.
Also, make sure that you have photos of the service in progress, especially if there is a visual component of the service. That way people can have a better idea of what to expect when they choose you.
Another good thing is to create a good layout for the page. It doesn’t need to be fancy. In fact, simpler is better. But make sure to break up your text by using columns and photos. Walls of text can be really intimidating.
Finally, make sure you have some sort of action for the user to take — fill out a lead generation form, call you, purchase something. That is the goal of that page and it’s how people are going to go from interested readers to customers or clients.
d. Adding in the about page
The next most important page is your about page. This is your chance to tell your story and how you got into your profession.
Use this page to talk about why you love photography or whatever you do. You can also discuss projects that were important to you and made you better at what you do. Essentially, this is a sales pitch for potential clients or employers.
I know that writing about yourself can be a challenge, but really take some time to craft your life’s story into words. Plus, you can include photos from various points in your life and even embed video if that helps you create a better about page.
And again, make it unique to who you are.
e. Make sure you have a contact page
The last important page you need to have on your personal website is a contact page. This is how people can find and contact you outside of your website, if you want them to.
After all, if you’re looking to get hired by someone, they’re going to need a way to get in contact with you — whether it’s through a form or email address or phone number.
This is a great place to have another set of links to your social media profiles for people to follow you there.
If you wanted to you could also put your email address and even phone number if you’re brave enough.
If not, you can create a “Contact Me” form using the form builder plugin you installed earlier (or that’s included with your platform) and embed that form on this page. That way people can get into contact with you, but you don’t have to worry about exposing your email address to the world.
But do make sure that people have a way to get in contact with you through your website.
9. Taking your website live
Now that you’ve set up your website with your design and any extensions and added in your content, it’s time for the last step in creating your new website: take it live!
This step will really depend on what web host and platform you’re using for your site. For some web hosts, you might have created your website using your domain name that you picked out in the first step. If that’s the case, all you need to do is make sure that you are allowing search engines to index your website (under the “Reading” settings for WordPress websites) and to publish your URL on social media.
If you built your new website with a temporary domain (for example, WP Engine starts you with sitename.wpengine.com), then you’re going to have to follow their steps for changing the URL to be your domain name. They should each have guides on how to do this or you can reach out to support for help.
But once it’s live be sure to let people know about it. Post about on your social media profiles. Include it on business cards if you want. Make sure to add it to your email signature.
a. Share it with the world
And whenever you publish a new blog post, be sure to post about it on your social media profiles.
You will probably want to set something up to publish your new blog post to your social media channels automatically when you hit publish. That way you don’t have to worry about forgetting.
There are a number of ways you can do this for your website. If you’re using WordPress, the easiest is to use the Jetpack Social plugin which will automatically post to your Twitter, Facebook, LinkedIn and Tumblr profiles when you hit publish.
Another really good option is the Social Media Auto Publish plugin, which also allows you to publish to Instagram as well. That might be beneficial if you love taking great photos.
But do make sure to let people know when you’ve published new content on your website!
b. Add your website sitemap to Google
You’ll also want to add your website’s sitemap to Google Search Console so that it can be indexed and start to show up in search results.
Creating a Google Search Console account is pretty easy until you need to verify your website ownership. That generally requires putting a tracking code or something else on your website so that Google knows that it’s yours. You can find specifics for how to do that for your chosen platform from their documentation.
But if you’re using WordPress, you can use the Google Site Kit plugin to hook your website to Google Analytics and Google Search Console. It will walk you through all of the steps to get started. And once you finish, be sure to go to your Google Search Console and add your website’s sitemap to Google to be indexed.
Adding your sitemap to Google is key because that can help Google index it quicker and get your new website showing in search results, which can be key if you’re looking for clients or customers.
You can learn more about how to do that with this blog post.
10. Managing your website after launch
So now that you’ve created your new website and shared it with the world, you’re done with the website outside of creating new blog posts, right?
Wrong.
In addition to new blog posts and photo galleries from projects you’ve worked on, there are other things you need to regularly do on your website to keep it up and running.
Let’s take a look at the big ones.
a. Update your website
Depending on what you used to create your website, you might need to perform updates on your website to keep your components up-to-date. For example, with WordPress you’re going to have WordPress core, plugin and theme updates that you’ll need to run often.
There will be security fixes in those updates, so keep updated so that your website is secure. Plus, those updates will contain bug fixes and new features that can make it better for you to use your website.
So make sure that you’re taking time to update your website at least once a week.
b. Update your content
Another thing you’ll need to do is to keep your content up-to-date on your new website.
Make sure that your contact information is correct. If you change phone numbers or email addresses, change that on your website as well. Otherwise, someone won’t be able to get in touch with you, and you’ll miss out on potential clients and work.
Also, it’s a good idea to keep your about page updated as well. You don’t have to change it whenever you complete a project, but maybe once a year revisit it and see if it needs to be rewritten, especially if you start to change services.
If you also have a resume page, make sure it’s always up-to-date with where you’ve worked and, maybe more importantly, what skills you have to offer someone.
But make sure that periodically you check and make sure that the content on your website is up-to-date and reflects what you’re doing.
c. Check your analytics
If you really want to grow this website outside of being a small side project, you’ll want to check analytics every now and then to see how you’re doing.
This is where having something like Google Analytics can help you see what’s going on with your website. It should be pretty easy to get started with Analytics, though the specifics will depend on your chosen platform. Again, if you’re using WordPress, the Google Site Kit plugin will make it super easy to set up Analytics on your website.
But once you get going, you can see if people are bouncing right after they are arriving to your website, which could be an issue with how your internal linking is. You can see if you’re getting repeat visitors or only first-time visitors.
And then from these stats, you can make changes to your website that will make it better for your users and hopefully increase sales and conversions on your website.
Don’t discount what you can learn from analytics!
d. Creating a blog
The final step in creating your new website is to add in a blog if you want. A blog can be just a way for you to talk about your life or you can use it as a content marketing tool.
What you write on your blog depends on your goals for the website and what your website is about. If it’s a personal website, the blog can be about anything to do with your life.
But if the website is for a business or is your portfolio website, you’ll want to write more about your industry. You can use tools like Google Keyword Planner to find what people are searching for online around your industry and create blog posts for those keywords. That way you can get found in those search results and hopefully increase your sales and conversions.
If you want to learn more about how to create a great blog post, you can check out this blog post. And if you want to learn more about keywords and SEO, you can check out the video below.
Get started on your new website with help with the SMB kit
Are you ready to start creating a website for yourself or your business, but want help to get started? Then you’ll want to check out the Small Business Website Starter Kit.
With this kit, you’ll get a wonderful WordPress website that’s designed to meet your needs and match what you want for your business. It will also come with a solid SEO foundation to help you get found in searches, a Google Business Profile, security and accessibility, and live training so that you know exactly how to use your website.
And this website will be online in less than two weeks for under $1,000. It’s the perfect way to get your business online quickly and in a way that will help your business grow!