Google Analytics holds a treasure trove of information and data about your website.
You can basically find any piece of data that you want to know about your website. You can see how many people are coming to your website. And you can tell where people are coming from and how much time they are spending on your website.
Plus, if you have an online store you can hook it up to the ecommerce section of your website. And you can track conversions of sales or people who complete a lead generation form.
But at the same time, that fire hose of information can be very confusing, especially if this is your first time taking a deep dive into the world of analytics. What does this statistic mean? How do I find this piece of information. How do I make decisions based on this information?
So if you’ve just set up Google Analytics for your website or you’ve set it up a while ago but never really paid attention to it (you’re not alone if you’ve done that), let’s go through five things you can do right now top help you gain a better understanding of your website’s statistics.
Take time to look around
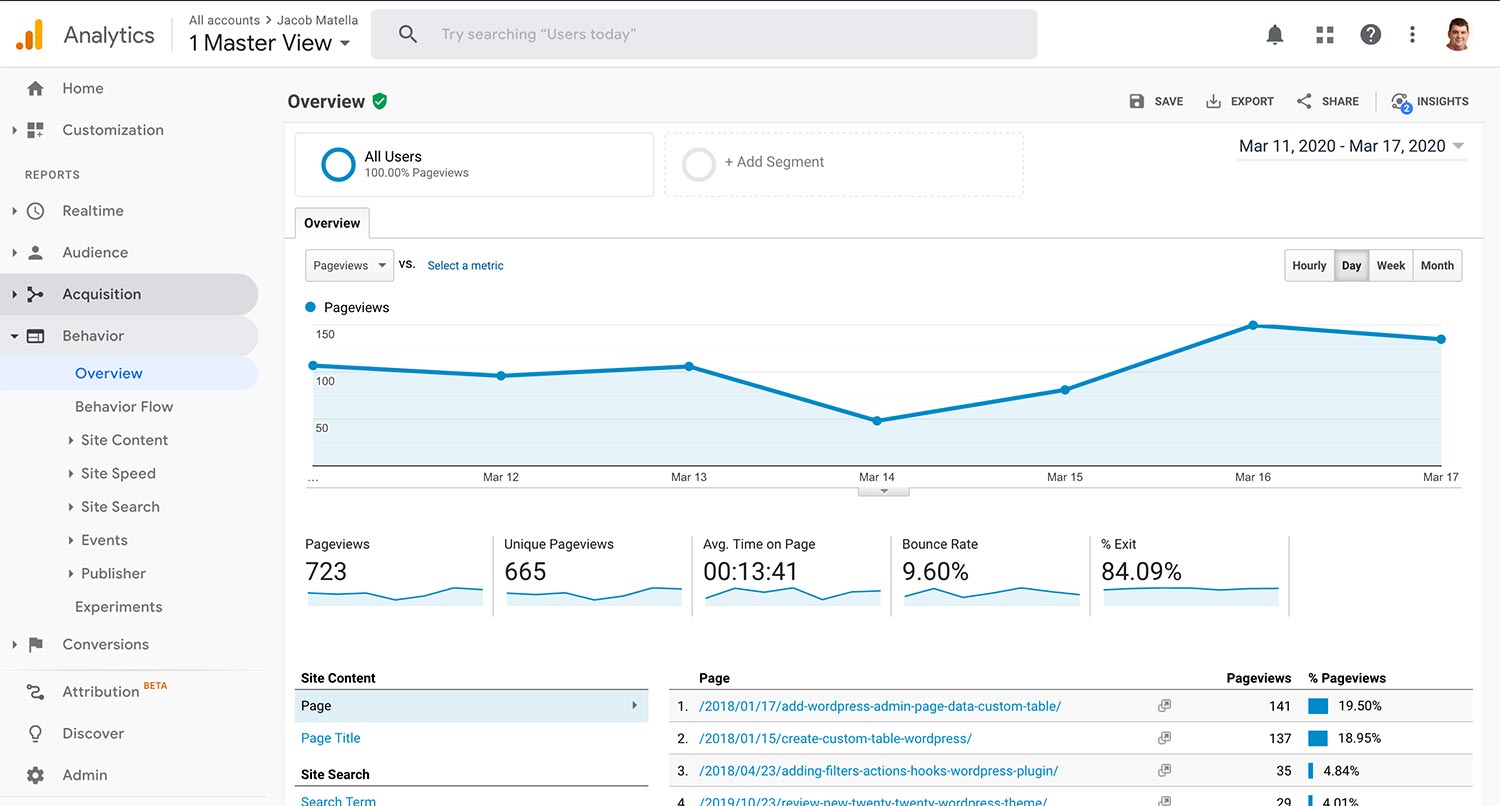
The first thing you should do when you set up your Google Analytics account with your website is to simply look around.
Check out all of the different things you can do and look at on the screen. Go look at the real-time analytics screens. See how you can filter out some results to see only what you want to see. Experiment with how you can create new views. Determine what data types you’ll want to track and what success means to you. You can see almost any statistic that you want.
Of course, you won’t really have much in the way of data to look at yet. And that’s okay. You’ll want to give it at least a week before you even start to take deep dives into the data and see what’s working.
But for now, look at what you can do, what you can see and what you think you want to track. It’s a powerful tool, and there’s so much that you can learn.
Create your Google Analytics views
The next thing you’ll want to do in Google Analytics is to create at least three different views: a master view, a raw data view and a test view.
Why do you need to create these different views? Well first in Google Analytics, once data comes in, it can’t really be modified. For example, when you first install Google Analytics on your website, you will only see data from that point forward. And if you modify a filter for a view, there’s no way to undo that change at a later date.
For that reason, it’s highly recommended that you at least have three views: a master view which only has limited filters to remove spam views, a raw view for all data and a test view to test filters to make sure they work.
And second, having multiple views allows you to review and analyze data quicker to see what’s working and what could be better on your website, such as only seeing data for blog posts or views from a specific country.
Creating a view
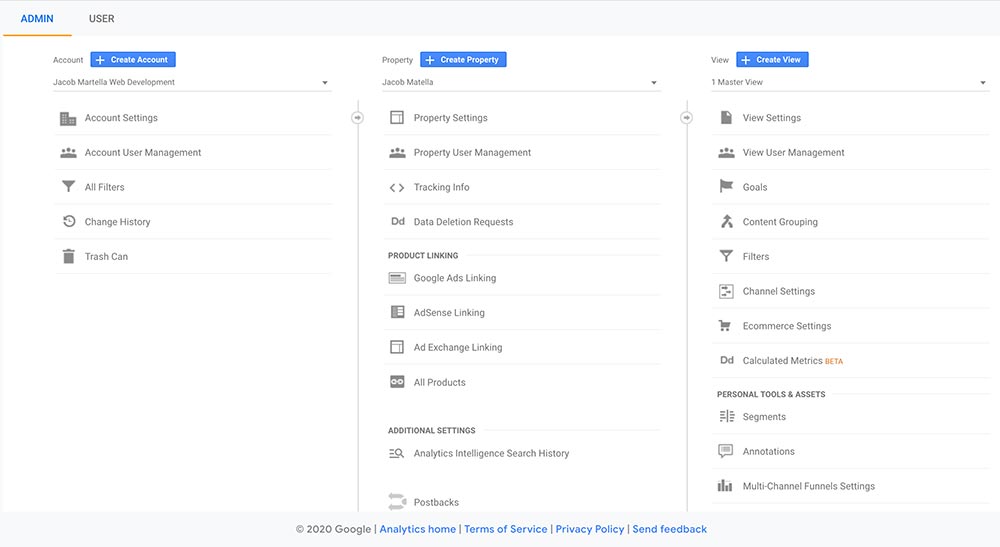
So first, we’re going to set up our master view. To edit the view, hit Admin on the bottom of the left-hand sidebar menu. You’ll then see three columns of more menus. The menu for a view (or views) is the far right menu.
For our master view, we’re going to simply change the View Name to master. Next we’ll add in the query parameters that we want to ignore so we don’t get duplicate urls and what not (we’ll talk about that in the next section). Then hit save.
For our raw data view, we’re going to hit Create View and then simply name our view Raw Data and we’re done.
Finally, repeat what you did for the raw data view for the test view. You can also go ahead and create other views for data you want to see, like visitors to your blog posts or from a specific country. You get 25 views, so use them as much as you need to.
Get Google Analytics Reporting For You
Want to get the lowdown on your website’s statistics but aren’t sure how to get going? Check out one of the WordPress Website Care plans where you can get Google Analytics and Google Search Console set up for you, custom reports, web hosting, updates, security and much much more. It’s the best way get the stats of your website.
Sign Up for a WordPress Website Care Plan TodayAdd filters to avoid spam, duplicate URLs
Once you have your views (or when you’re creating new views), you’re going to want to do a couple of things to avoid tracking spam views and duplicate urls.
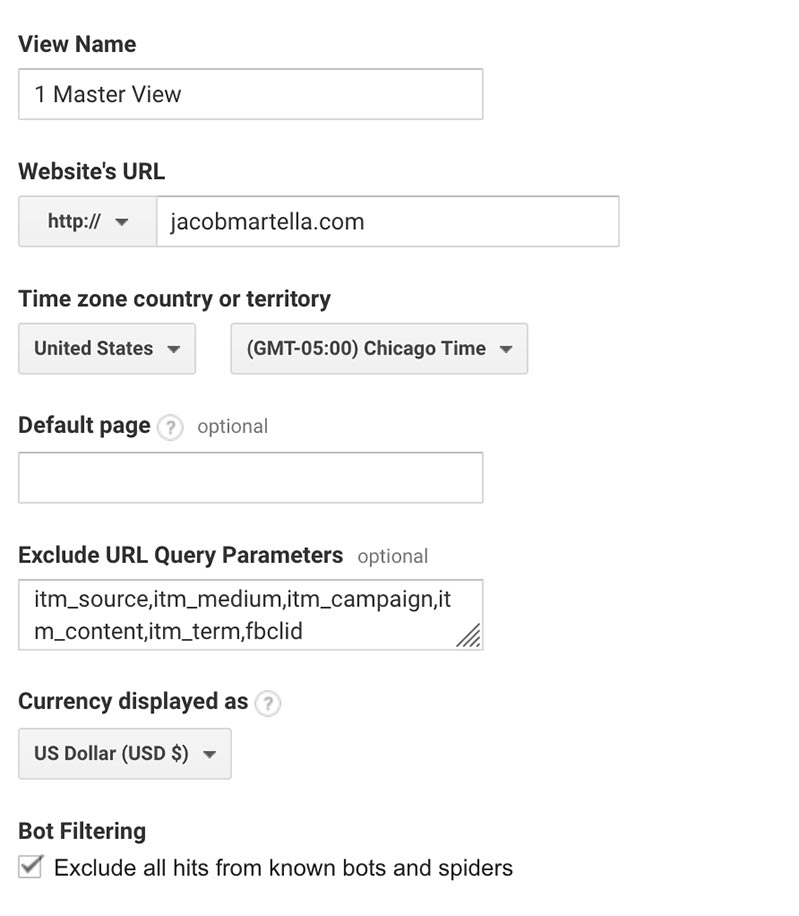
When you’re creating a new view (or editing your master view), you’re first going to want to add some query parameters to exclude. While Google Analytics will automatically ignore all of the utm parameters, it won’t for other ones. At the very least, you’ll want to make sure you have “fbclid” listed in the Exclude URL Query Parameters text box. This way, views from Facebook will have the same URL as the link instead of a new URL.
Next, check the box to exclude all hits from known bots and spiders so that you don’t have random stats from spam views that can skew the stats.
After that, we move into the Filters section in the View menu. At the very least for all of your non-raw data views, you should have two filters: Consolidate Hostnames and Spam Filters.
The first basically makes sure that any views from your www url are counted as if they were from your non-www url and vice versa. For this, you’ll use the custom filter type with search and replace, hostname as the filter field and “^www.” as the search string.
The second helps additionally filter out traffic from other spam websites. For this one, you’ll use the custom filter type with exclude, campaign source as the filter field and then the url to the spam site you want to filter out.
Now your views are ready to go. You can also use filters here to filter what comes through your views, such as visitors from only the United States or who visited a specific page.
Creating custom reports in Google Analytics
Another thing you’ll probably want to do with your Google Analytics account is to set up some custom reports. These are reports that you create and . And you can get them sent to you daily, weekly or monthly.
So for example, I have two custom reports set up. The first is for my landing pages with the source and medium to see how many people are hitting those pages and where they are coming from. And I have that set up for weekly delivery so I can see what I might want to change for the next week.
The second is similar but for my blog posts and is sent monthly so I can get a wider view of what’s happening during the month.
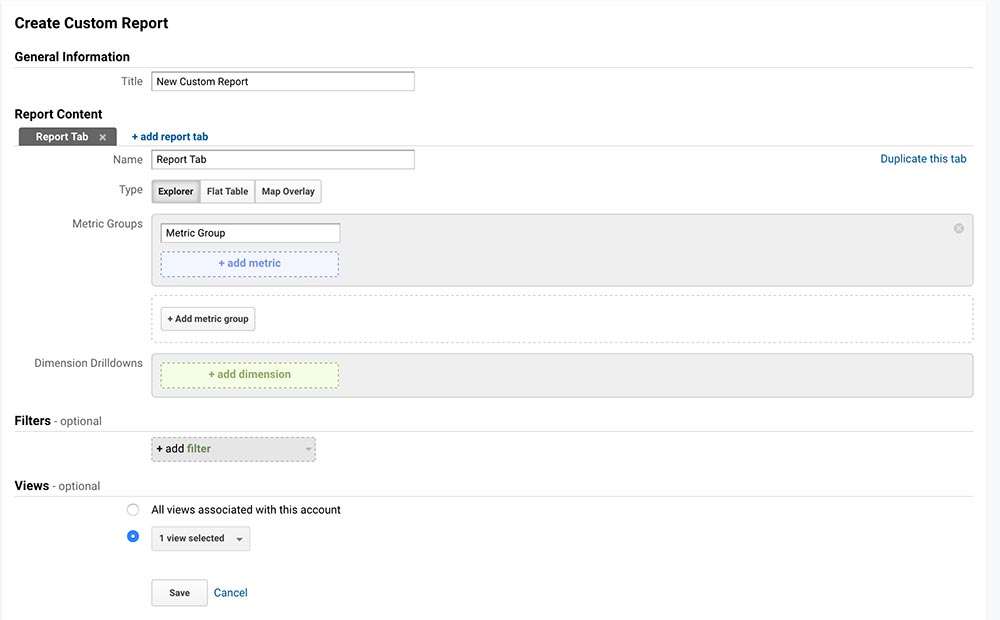
Creating those reports is fairly simple. First you’ll go to Customizations and then Custom Reports and then hit New Custom Report. From there, you’ll give it and the first tab a name. You can create multiple tabs to have multiple data types shown in the report.
Once you’ve named the report and tab, you choose whether this is going to be a basic table, something you can interact with or a map. Then you can add in the metrics you want, such as users, sessions and pages per session and the dimensions you want, like page views, how people got to your website and the like.
After that, you can then add in filters to only see things you want to see, like a specific page or a specific source and medium. And then you can select which view to associate with this report.
Finally, after hitting save, you can choose when you want it to be sent to you, either daily, weekly or monthly as well as a message to be sent with the report. And that’s it. You’ve created a new custom report.
Get Insights on How to do a Small Business Website Right!
Are you looking to get some help with your small business’ website, but aren’t quite in a spot to take that next step? No worries! I’ve got you covered with a small business newsletter. This weekly newsletter will talk about a different subject related to websites and small businesses each week, as well as highlight blog posts that can help you out. This will help you optimize your business’ site as much as you can while you get yourself into a position to take the next step for your website.
"*" indicates required fields
Create conversions
Finally, if you have a sign up form of some sort or an online store, you’re going to want to also set up conversions in Google Analytics. This functionality allows you to track people as they go through your sales funnel on your website and keep track of sales or other goals.
This one is a bit trickier because it depends on what you’re trying to do and what type of website you have. To create a new goal, you’ll need to go to “Admin”, navigate to your view and then select “Goals”. Then hit “New Goal” and from there you can create a myriad of goals for your website. You can learn more about how to specifically create a goal from Google itself.

But definitely give it a try. Creating goals and, maybe more importantly, creating funnels can help you figure out where there are issues with your website and why people aren’t converting into customers. And from that information, you can make the appropriate changes to your website.
So I hope that helps you with navigating Google Analytics for your website. Like I’ve said before, there’s a lot of information you can learn from the analytics you see. And once you’re able to understand that information, it can lead you to make better decisions with your website and digital marketing.